
Using XAML in Xamarin.Forms

XAML or eXtensible Markup Language is a declarative language used for creating user interfaces in Xamarin.Forms.
I already know what you're thinking:
Why would I want to use a markup language when I have the power of C#? Markup languages are for web pages - I'm building a mobile app with .Net - I want to use C#! And didn't XAML die with Silverlight and WPF?
I had the exact same reaction and resisted using XAML to build user interfaces in Xamarin.Forms for a very long time. However, once I gave it a shot, I came to see the power of XAML and haven't looked back since.
In this article, I'll show you the basics of building a Xamarin.Forms user interface in XAML and what some of the initially strange syntax means.
The Benefits of Using XAML
First and foremost, the biggest benefit to laying out a user interface in XAML is legibility. It becomes very apparent, very quickly, how the visual tree of controls lays out within a page when XAML is used.
Overall the code is more readable as well. For example, when a control is databound to a property in a view model, the XAML syntax is much cleaner than the corresponding C# syntax.
XAML Databinding Example:
<Label Text="{Binding FirstName}" />C# Databinding Example:
Label firstNameLabel = new Label();
firstNameLabel.SetBinding(Label.Text, "FirstName");
Combine that syntax over many controls within a page (not to mention placing the controls in their proper layouts and setting their properties), and the XAML version quickly becomes much more readable.
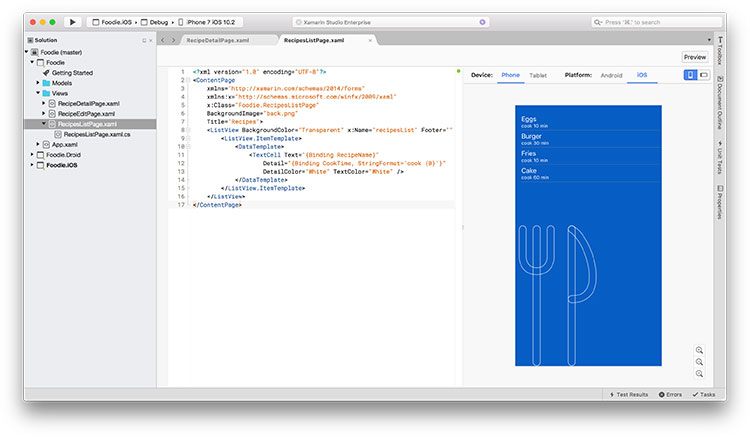
Finally, Xamarin has introduced an XAML previewer in both Xamarin Studio and Visual Studio. This tool allows the developer to view their user interface as they build it from within the IDE. The long build, deploy and debug cycle only to view user interface tweaks is gone - and that in itself is a good reason to switch to XAML!
Kitchenware by Xinh Studio via The Noun Project with modifications
The Basics
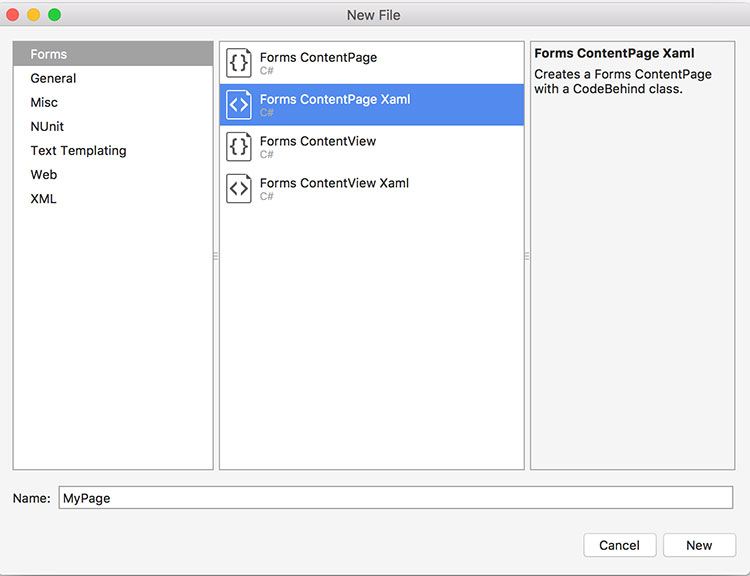
First off, you need a Xamarin.Forms page that is meant to be built with XAML, and you can find that under the New File dialog -> Forms ContentPage XAML option.
Once added, the template will appear as follows:
<?xml version="1.0" encoding="UTF-8"?>
<ContentPage xmlns="http://xamarin.com/schemas/2014/forms"
    xmlns:x="http://schemas.microsoft.com/winfx/2009/xaml"
    x:Class="Foodie.MyPage">

    <ContentPage.Content>
    </ContentPage.Content>

</ContentPage>
Ignoring, for the moment, the first line and the xmlns attributes, the opening <ContentPage> element lets the XAML parser know that it has come across a ContentPage and it should instantiate one. Other UI controls are then placed within the <ContentPage.Content> tags, which the XAML parser will then instantiate to build the UI.
The XAML parser is responsible for going through the XAML file, finding elements that need to be instantiated, setting their properties, placing controls in their proper place in the overall layout, perform any databinding, and so on. It is a pretty impressive piece of technology.
The first thing I want to take a look at are properties on various elements, and how the XAML parser understands them.
Properties
Properties come in two flavors in XAML. The first are known as Attribute Properties. These are the easiest and most intuitive to understand. Attribute properties are declared within the tag of the UI component they are a part of. The attribute name will always be the same as the control's property name you are referencing, but the value of the attribute will always be a string, regardless of the property's underlying datatype. As seen below with the TextColor property.
<Label Text="Burger and Fries" TextColor="Red" />You always specify a string because XAML must adhere to the rules of XML, and the XAML parser is smart of enough to be able to do various type conversions on the fly.
The second type of property encountered in XAML is called the Element Property. These are used when the value of the property is too complex to be expressed within a simple string.
Element properties have a tendency to hide in plain sight. In the example from above when the blank ContentPage was created, the <ContentPage.Content> element is an Element Property. That property is used to hold the rest of the content of the page, which of course is too complex to be expressed as a string!
Element properties will always be expressed as XML elements. And they will always be of the format {ClassName}.{PropertyName}. You cannot reference a property only by its name alone.
Reacting to Events
Of course, sometimes you will need to react to events that a control raises. And even though a control has been defined in a XAML file, you still can access it in the C# code behind file.
You can respond to an event in one of two ways. The first is simply to reference the event's name as an Attribute Property, and then specify a function name. Then in the code-behind file, create a function of the same name - making sure the method signature matches what is expected from the event.
The XAML:
<Button Text="Edit" TextColor="White"
    BackgroundColor="#065ec4" Clicked="recipeClicked"></Button>
The Code-behind:
void recipeClicked(object sender, System.EventArgs e)
{
    // Handle the click event
}
The next way to handle events raised from controls defined in XAML is to use another Attribute Property: x:Name - this gives you access to the entire control in the code-behind file, not just the event. With access to the entire control, you can then handle the Clicked event as such:
recipeButton.Clicked += (sender, args) =>
{
    // do something
}
And, of course, you can access any properties of that control as well.
Summary
In this article, you saw a brief overview of the eXtensible Markup Language for Xamarin.Forms. I shared some of the reasons I believe that it's a good idea to use XAML over C# to build user interfaces. We also explored how to create and use the two property types and how to respond to events that controls defined in XAML raise from the C# code behind file.
Next Steps
In the next article, I am going to build up a fully functional app with XAML as the user interface. Along the way I will introduce more advanced concepts as well, such as data binding, accessing resources defined elsewhere in the app from XAML, invoking constructors, and having XAML only apply to certain devices.

The Telerik Team
Comments
All articles
Topics
Latest Stories
in Your Inbox
Subscribe to be the first to get our expert-written articles and tutorials for developers!
All fields are required