
IoT with Windows on Devices

The Internet of Things (IoT) allow us to connect people and things around the world using an IPV6 address. With the size of IPV6, we could assign an IP address to every atom on the surface of the earth, and still have enough IP addresses left to do another 100+ earths. In other words, humans could easily assign an IP address to every "thing" on the planet. It isn't very surprising that we have started to see them being included in "things" such as heart monitoring implants, smart thermostats and garage door openers that use WiFi for remote monitoring.
Where does Microsoft fit in? At //Build 2014 they demonstrated a version of Windows running on a Intel Galileo board. They opened a signup page and off we went. Since //Build 2014, better hardware has been released as well as updated images of Windows for Embedded Devices. We've also recently heard about Windows 10 running on a Raspberry Pi 2! Exciting times are ahead for us!
In this post, I'll take you through the process of what you need in order to get started developing apps that run on Microsoft's Windows on Devices using the Intel Galileo V2 board. Since we will be using Visual Studio 2013, I'll show you how you can leverage the Windows platform and utilize familiar Win32 programming.
The Intel Galileo V2 Board
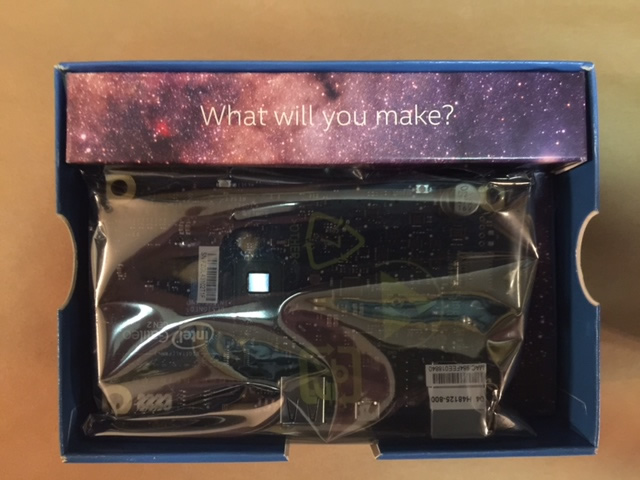
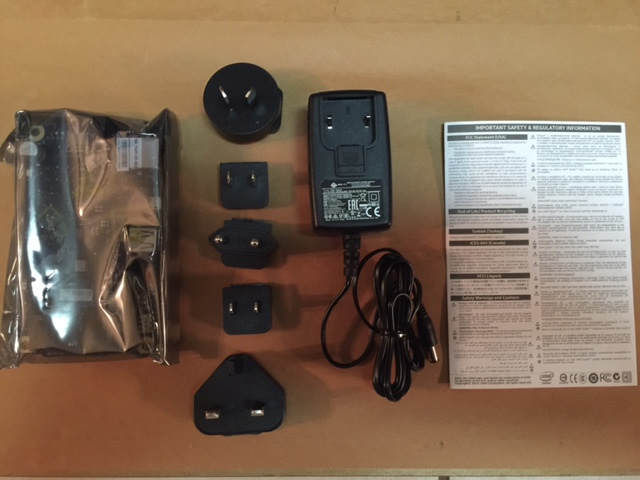
You can buy the board from several electronic shops. Just pick your favorite and make sure it is the V2 model. After opening the box, you will see your board in a static resistant bag and a wide range of adapters for various power outlets found all over the world. It also comes with some brief safety information.
The board itself looks like the following:
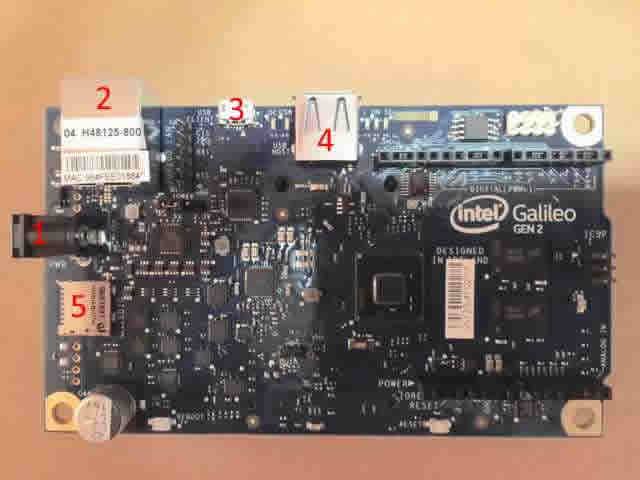
- Connects to an external Power Supply.
- Ethernet port
- Connects to PC via USB
- Additional USB Port
- microSD Slot (specs recommend at least 16GB)
Now that you know the basics of your hardware, we will dive more in-depth and take a look at setting it up to boot Windows.
Setting up your Intel Galileo V2 Board
The Intel Galileo V2 board points you to the following instructions. I found that the only steps that were particularly important were that you update the Software Drivers and were able to run the blink test on the actual board (not an external LED). If you can do both of these things, then move on to the following steps:
- Insert a microSD card into your PC and format it with Fat32.
- Download the following three files from the MS Connect site (You will need to be registered and logged in to download these files):
- apply-BootMedia.cmd - Imaging Script for Windows image
- Microsoft Windows Images (WIM) for Embedded Devices
- The MSI Installer (optional, but recommended) installs templates and an application that helps perform certain tasks with your Galileo.
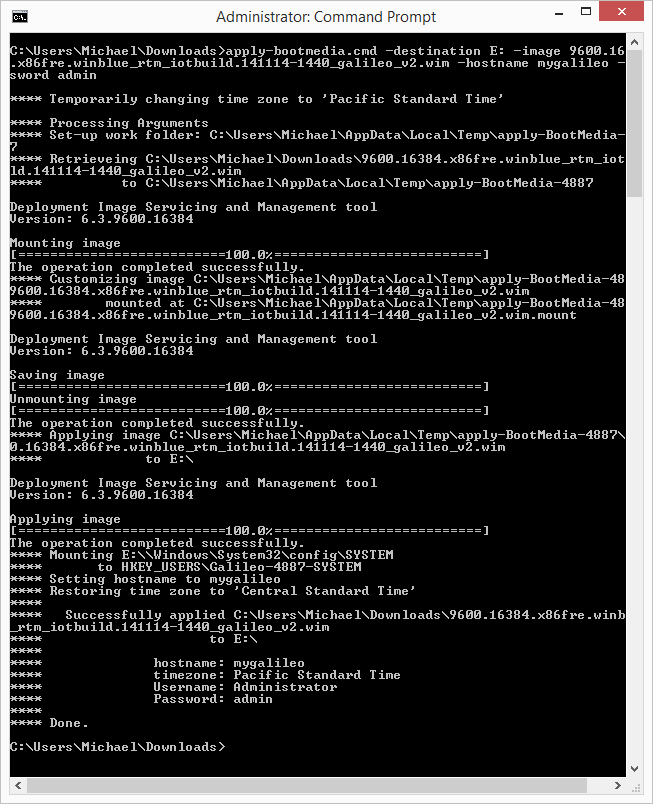
- Navigate to the directory where you downloaded the files and run the following at an administrative command prompt.
apply-bootmedia.cmd -destination {WhateverYourSDCardDriveLetterIS} -image {latest WIM image} -hostname mygalileo -password admin
You should see the following on your screen once everything is complete. (notice my drive letter was E:) Pay special attention to the hostname/username and password as you will need this later. Simply take out the microSD of your PC and insert the microSD into your board along with the ethernet cable and power cable.
Once this process has completed, you are ready to run Windows for Embedded Devices on your Intel Galileo board.
Make sure you have Telnet installed on your PC. There are various guides on the internet of how to do so and power down your Intel Galileo board.
If you haven't done so, now is a great time to go ahead and run the the MSI Installer which creates Visual Studio templates as well as installs an application called Galileo Watcher.
When you run the application and you should see the following:
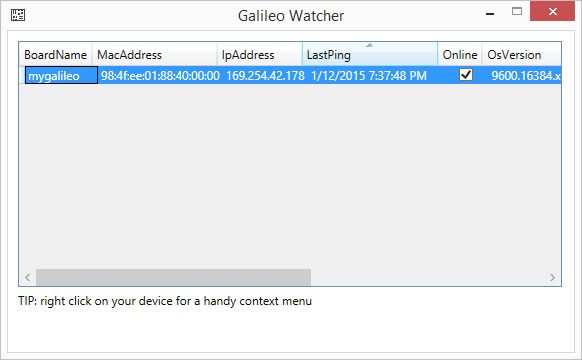
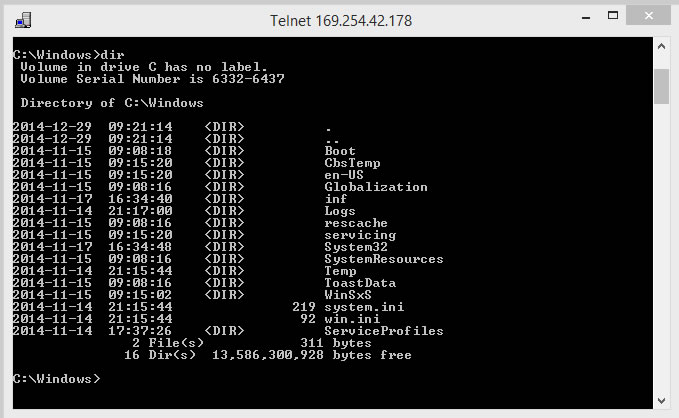
If you right click and select "Telnet here", you can log in using the username and password you created earlier. You should land in the C:\windows\system32 directory:
User name: Administrator
Password:

Microsoft Windows [Version 6.3.9600]
Copyright (c) Microsoft Corporation. All rights reserved.

C:\windows\system32>
With a simple right-click on your Galileo board (using the Galileo Watcher), you can also open a web browser that allows you to view the following:
- Task List
- File List
- Memory Statistics
Here is an example of what you might find on http://yourgalileoipaddress/memstat
36 percent of memory is in use.
There are     239 total Mbytes of physical memory.
There are     152 free  Mbytes of physical memory.
There are    1263 total Mbytes of paging file.
There are    1179 free  Mbytes of paging file.
There are    2047 total Mbytes of virtual memory.
There are    2042 free  Mbytes of virtual memory.
There are       0 free  Mbytes of extended memory.
Exploring the Visual Studio Template
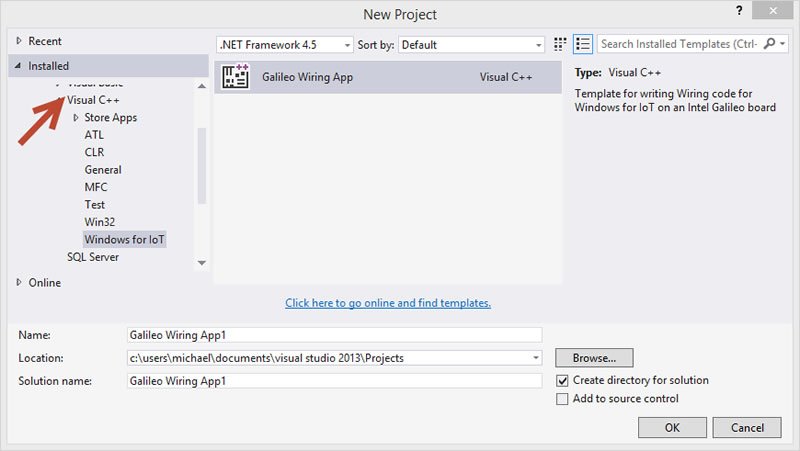
Included in the MSI that contains the Galileo Watcher program is a Visual C++ template that allows you to write an app using Visual Studio. It is basically a C++ console app that has references to the Galileo-SDK, so that we can talk to the Arduino side of things. The template looks like the following :
If you navigate to the Main.cpp in the "Source Files" folder, you should see the following code:
// Main.cpp : Defines the entry point for the console application.
//

#include "stdafx.h"
#include "arduino.h"

int _tmain(int argc, _TCHAR* argv[])
{
    return RunArduinoSketch();
}

int led = 13;  // This is the pin the LED is attached to.

void setup()
{
    // TODO: Add your code here

    pinMode(led, OUTPUT);       // Configure the pin for OUTPUT so you can turn on the LED.
}

// the loop routine runs over and over again forever:
void loop()
{
    // TODO: Add your code here

    digitalWrite(led, LOW);    // turn the LED off by making the voltage LOW
    Log(L"LED OFF\n");
    delay(1000);               // wait for a second
    digitalWrite(led, HIGH);   // turn the LED on by making the voltage HIGH
    Log(L"LED ON\n");
    delay(1000);               // wait for a second
}RunArduinoSketch method. It sets up an led variable that is attached to a pin on the board. This pin will simply blink on and off via the loop method.
You can hit F12 which is "Go To Definition" on the RunArduinoSketch() and notice that it opens arduino.h and calls the setup method.
You will find this code Identical to the Arduino IDE sample code with the exception of pulling in the Arduino header file and the Log method as shown below:
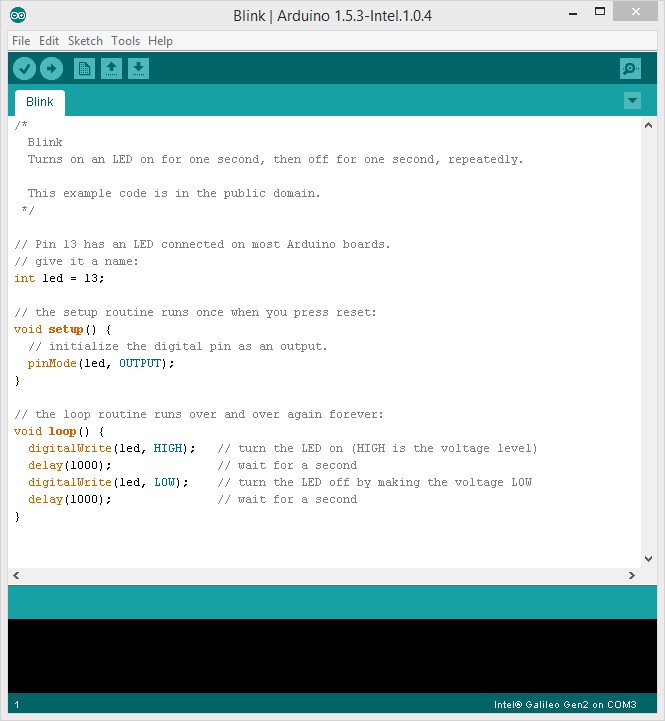
Make sure you have a LED pin in Pin 13 (The longer Pin connects to Pin 13 and the shorter one to Ground). If you do not have a kit such as the following one - which contains some LEDs that are required, then you can also comment out the LED code to view the log messages to ensure your board and Visual Studio are talking to each other.
Run It!
As long as you left the default name of your board as mygalileo, you can simply press "Remote Windows Debugger". It will pop up a message asking for authentication and you should use the following if you haven't changed it.
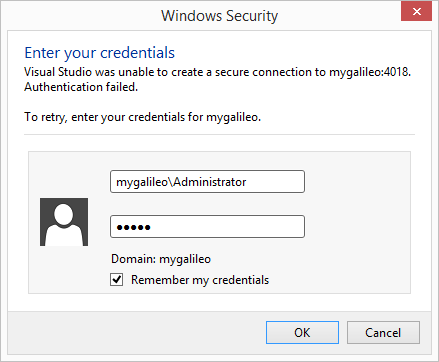
The password is a lowercase "admin" (without quotes).
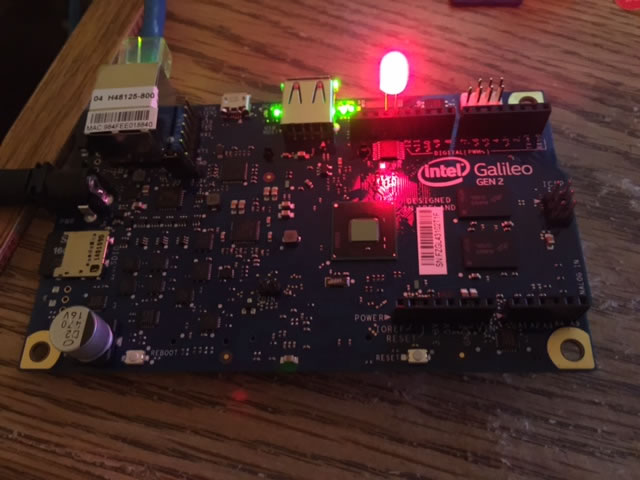
Your device should have a blinking LED as shown below:
If you take a look in your Output Window in Visual Studio, you will see the following:
LED ON
LED OFF
LED ON
LED OFF
LED ON
LED OFF
LED ONWriting an App in Visual C#
If you create a new Visual C# console application and change the build options to x86, then you can use certain parts of .NET to write an app for the board. Here is a small app that I wrote that using the System.Threading and System.Globalization namespaces and it runs just fine on my Galileo V2 board :
static void Main(string[] args)
{
    Console.WriteLine("Telerik Developer Network");
    CultureInfo currentCulture = Thread.CurrentThread.CurrentCulture;
    Console.WriteLine("The Current Culture is : " + currentCulture);
}C:\test>HelloWorld
Telerik Developer Network
The Current Culture is : en-USIt is advisable to shutdown Windows before closing the command prompt as their is no UI yet for Windows on Devices. You can do so by:
shutdown /s /t 0What's Next?
I think we will learn more at the Build 2015 conference about Microsoft's plans for Windows on Devices. As stated earlier in this article, Microsoft has announced they will be bringing Windows 10 to Raspberry Pi 2! These devices run about $35 USD and pack a powerful punch in terms of hardware. Exciting times are upon us!
Also, since your probably are a .NET developer and currently developing a solution of some sort. I'd encourage you to to download and explore our ASP.NET, WPF and Windows Universal apps UI suites, as well take a look at the overall collection.
Header image courtesy of Intel Free Press

Michael Crump
Michael Crump is a Microsoft MVP, Pluralsight and MSDN author as well as an international speaker. He works at Telerik with a focus on everything mobile. You can follow him on Twitter at @mbcrump or keep up with his various blogs by visiting his Telerik Blog or his Personal Blog.
Comments
All articles
Topics
Latest Stories
in Your Inbox
Subscribe to be the first to get our expert-written articles and tutorials for developers!
All fields are required