
5 Ways to Export from ASP.NET to Word and PDF Files

Building feature rich applications can often leave users asking to take visual elements off the screen to be used elsewhere. Being able to export from an application to Word or PDF opens up new possibilities, such as sharing, reporting or even satisfying Sarbanes–Oxley (SOX) audit requirements.
Getting data out of your application and into standard formats like Microsoft Word and Adobe PDF can be a daunting task. Especially when performance optimizations for large datasets, document customization & appearance, and supported platforms are taken into consideration. However, with the right tools, adding this feature to your .NET application can be as simple as a few lines of code. Let's take a look at 5 ways we can include rich document functionality in our .NET apps with very little code and time investment.
For most of the examples we'll be using the Telerik Document Processing Library (DPL), which is distributed at no additional cost with the Progress Telerik UI libraries for ASP.NET Web Forms and MVC. For the desktop developers out there, the DPL is also included with WPF, Silverlight and WinForms. In addition, no MS Office licenses or dependencies are required to use the DPL. As a bonus for web developers, we’ll see that the Telerik UI libraries have powerful client-side APIs for exporting content directly from the screen.
If you’re using Telerik UI, you already have these capabilities in your toolbox and we’ll learn how to leverage them. If you’re not using Telerik UI yet, but would like to increase your developer productivity, learn more about it here.
1. Create New Word Document in .NET
Having the ability to create a new Word document from code provides a great deal of flexibility. With a just few dependencies we have access to Word document creation APIs that include text, image, and link generation. For this example we'll use RadFlowDocument and RadFlowDocumentEditor to create a new Word document from a .NET console application.
We'll start with a few dependencies like System.IO to handle a file stream, and the necessary Telerik DPL assemblies.
using System.IO;
using Telerik.Windows.Documents.Flow.FormatProviders.Docx;
using Telerik.Windows.Documents.Flow.Model;
using Telerik.Windows.Documents.Flow.Model.Editing;
Next, we create a new RadFlowDocument and RadFlowDocumentEditor. The RadFlowDocumentEditor will allow us to insert new text, image and other elements to the document.
static void Main(string[] args)
{
    RadFlowDocument document = new RadFlowDocument();
    RadFlowDocumentEditor editor = new RadFlowDocumentEditor(document);
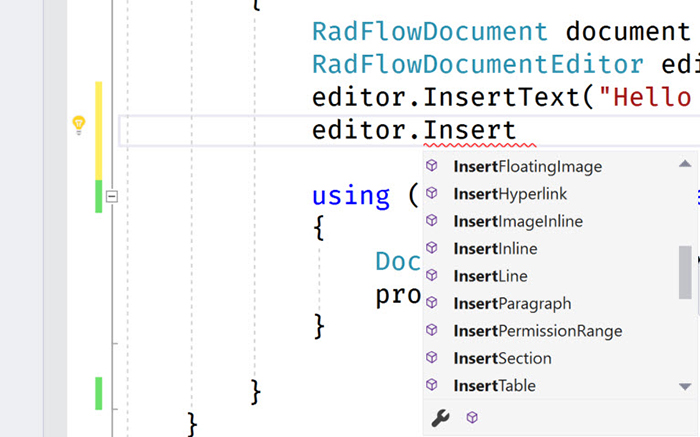
Using the editor we'll write some text to the document using the InsertText method. We also have additional methods available such as:
- InsertFloatingImage
- InsertParagraph
- InsertTable
- InsertHyperlink
- and more
static void Main(string[] args)
{
RadFlowDocument document = new RadFlowDocument();
RadFlowDocumentEditor editor = new RadFlowDocumentEditor(document);
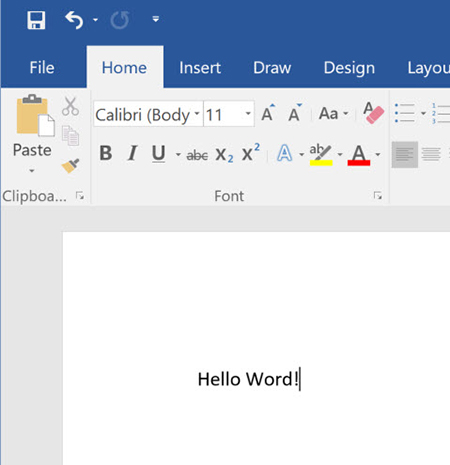
editor.InsertText("Hello Word!");Once the document is complete, we just need to write it to the a FileStream. For the RadFlowDocument we'll use the DocxFormatProvider to export to the DOCX format. Similarly we could use a PdfFormatProvider to create a PDF document.
using System.IO;
using Telerik.Windows.Documents.Flow.FormatProviders.Docx;
using Telerik.Windows.Documents.Flow.Model;
using Telerik.Windows.Documents.Flow.Model.Editing;

namespace DocProcessing
{
    class Program
    {
        static void Main(string[] args)
        {
            RadFlowDocument document = new RadFlowDocument();
            RadFlowDocumentEditor editor = new RadFlowDocumentEditor(document);
            editor.InsertText("Hello Word!");

            using (Stream output = new FileStream("output.docx", FileMode.OpenOrCreate))
            {
                DocxFormatProvider provider = new DocxFormatProvider();
                provider.Export(document, output);
            }

        }
    }
}
In this example, files created using the Telerik DPL are saved directly to disk. However, any file created using the DPL can also be downloaded via the browser from UI for ASP.NET AJAX and UI for ASP.NET MVC applications.
2. Mail Merge from .NET
Creating a mail merge is an effective way of building a template and populating it with data for processing documents in batches. With the mail merge process, you can create a series of personalized documents based on your data source.
The Mail Merge process is one that is often manually performed inside of Microsoft Word. With the Telerik DPL this process can be completely automated and customized based on the needs of your application. The mail merge APIs can be used virtually anywhere in .NET. To see it in action we'll use an example of how a mail merge is executed in an ASP.NET Web Forms application.
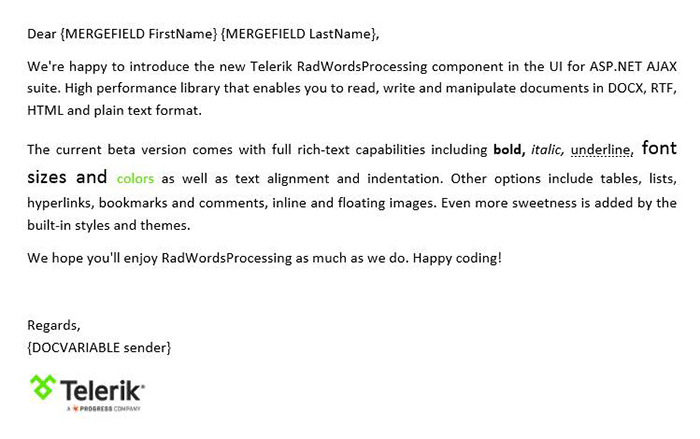
We'll create a new document containing our template message. To create a template field in the document we'll use the InsertField method and set the field code to MERGEFIELD with the variable name we wish to use, in this case FirstName. The variable name simply matches the property on an object that we'll supply to the MailMerge method.
private RadFlowDocument CreateDocument()
{
    RadFlowDocument document = new RadFlowDocument();
    RadFlowDocumentEditor editor = new RadFlowDocumentEditor(document);

    editor.InsertText("Dear ");
    editor.InsertField("MERGEFIELD FirstName", "");
    editor.InsertText(" ");
    editor.InsertField("MERGEFIELD LastName", "");
    editor.InsertLine(",");
    editor.InsertLine("This is a sample Mail Merge");
    return document;
}
With the document created, the next step will be to perform the mail merge. For simplicity, we'll do our work on the page load event of the webform. The MailMerge method takes any IEnumerable as a parameter, in this case we'll use a predefined list of Person via GetRecipents. In this case Person has a FirstName and LastName property matching the MERGEFIELD variables.
protected void Page_Load(object sender, EventArgs e)
{
    RadFlowDocument document = this.CreateDocument();
    RadFlowDocument mailMergeDocument = document.MailMerge(GetRecipients());
    //save the document
}
The document can be saved to the server or sent directly to the client. Serving the document to the client requires setting up a MemoryStream and calling Export from a DocxFromatProvider. Once the memory stream is ready, we'll write it to the response with the corresponding ContentType for a .DOCX file.
protected void Page_Load(object sender, EventArgs e)
{
    RadFlowDocument document = this.CreateDocument();
    RadFlowDocument mailMergeDocument = document.MailMerge(GetRecipients());
    byte[] renderedBytes = null;

    using (MemoryStream ms = new MemoryStream())
    {
        var formatProvider = new DocxFormatProvider();
        formatProvider.Export(document, ms);
        renderedBytes = ms.ToArray();
    }

    Response.Clear();
    Response.AppendHeader("Content-Disposition", "attachment; filename=MailMergeFile.docx");
    Response.ContentType = "application/vnd.openxmlformats-officedocument.wordprocessingml.document";
    Response.BinaryWrite(renderedBytes);
    Response.End();
}
The result is a multi-page .DOCX file for each recipent provided to the mail merge. This type of document can easily be printed and sent to clients as physical mail. See demos.telerik.com for a more comprehensive demo that includes additional file types and document features.
3. Convert Word to PDF in .NET
One of the Telerik DPL strengths is its ability to import and export various file types like: DOCX, PDF (export only), HTML and RTF. Because of this ability, it can also be used to do file conversions between these types as well. Using the IFormatProvider we can utilize the various format providers within the Telerik DPL interchangeably. Let's take a look at a basic example of a console app that can import a DOCX file and export it to PDF.
We'll begin by creating a default provider using an IFormatProvider and setting it to an instance of DocxFormatProvider. A RadFlowDocument is used as our document in the conversion from DOCX to PDF.
IFormatProvider<RadFlowDocument> fileFormatProvider = new DocxFormatProvider();
RadFlowDocument documentToConvert = new RadFlowDocument();
The DOCX document is opened from disk using the DocxFormatProvider and streamed into memory.
    using (FileStream input = new FileStream("input.docx", FileMode.Open))
    {
        documentToConvert = fileFormatProvider.Import(input);
    }
With the document in memory as a RadFlowDocument we can change our provider from a DocxFormatProvider to a PdfFormatProvider. Now the document can be written back to disk as a PDF.
    fileFormatProvider = new PdfFormatProvider();

    using (Stream output = new FileStream("output.pdf", FileMode.OpenOrCreate))
    {
        fileFormatProvider.Export(documentToConvert, output);
    }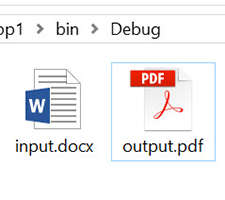
As you can see in the complete example, in just a few short lines of code we're able to convert from DOCX to PDF.
static void Main(string[] args)
{
    IFormatProvider<RadFlowDocument> fileFormatProvider = new DocxFormatProvider();
    RadFlowDocument documentToConvert = new RadFlowDocument();

    // Read DOCX
    using (FileStream input = new FileStream("input.docx", FileMode.Open))
    {
        documentToConvert = fileFormatProvider.Import(input);
    }

    // Write PDF
    fileFormatProvider = new PdfFormatProvider(); // change format provider to PDF

    using (Stream output = new FileStream("output.pdf", FileMode.OpenOrCreate))
    {
        fileFormatProvider.Export(documentToConvert, output);
    }
}
This method of importing and exporting documents can be used to convert between file formats. One caveat however is that there is no import functionality for PDF documents due to file format limitations. To deal with this limitation the IFormatProvider is equipped with a CanImport property that can be checked before the Import operation is performed.
See the ASP.NET Webforms or ASP.NET MVC WordsProcessing pages for more comprehensive demos that includes additional file types and web scenarios.
4. Edit Microsoft Word Docs in ASP.NET
Customers can sometimes ask for time-consuming project requirements, like the ability to edit Word Documents in the browser. On the surface this sounds like a feature that will take quite a bit of effort to accomplish; however, it's as simple as adjusting the right properties on any Telerik UI editor widget for ASP.NET Webforms or ASP.NET MVC.

Using UI for ASP.NET MVC the ability to import and export right from the Editor widget can be accomplished right from the Razor view.
@(Html.Kendo().Editor()
    .Name("editor")
    .HtmlAttributes(new { style = "height:440px" })
    .Tools(tools => tools
        .Clear()
        .ExportAs()
        .Import()
    )
    .ExportAs(exportAs => exportAs
        .FileName("editor_content")
        .Proxy("Export", "EditorExport")
    )
    .Import(import => import
        .Proxy("Import", "EditorImport")
        .AllowedExtensions(new[] { "docx", "rtf", "html", "txt" })
        .MaxFileSize(104857600)
        .Select("onSelect")
        .Error("onError")
    )
)
To export the content include the corresponding command to the editor’s toolbar .Tools(tools => tools.ExportAs()) and configure the export settings through the ExportAs attribute. For instance you should specify the Proxy option, which sets the Action to which the content will be submitted, or you can specify FileName attribute to set the name of the downloaded file.
See the ASP.NET Webforms or ASP.NET MVC pages for more comprehensive demos that include additional editor features.
5. Client-side Export From HTML page to PDF
Applications that include charts, maps and schedules can empower users by giving them the ability to visualize data. And, having a visually rich app can often leave users asking to take visual elements off the screen to be used elsewhere. When trying to capture exactly what the users sees on the web we cannot rely on server-side technologies like the DPL. Fortunately, the Telerik UI libraries for ASP.NET (AJAX, MVC, Core) are all powered by the HTML5 & JavaScript library Kendo UI and can export HTML to PDF directly on the client.
We'll start with an ASP.NET Core application using Telerik UI for ASP.NET Core. Because UI for ASP.NET Core is powered by Kendo UI, we'll have full access to its drawing APIs. In the following example, we have a Human Resources dashboard with complex UI controls like charts, graphs and grids. Let's wire up the Export AS PDF button with a few lines of jQuery to export on the client side.
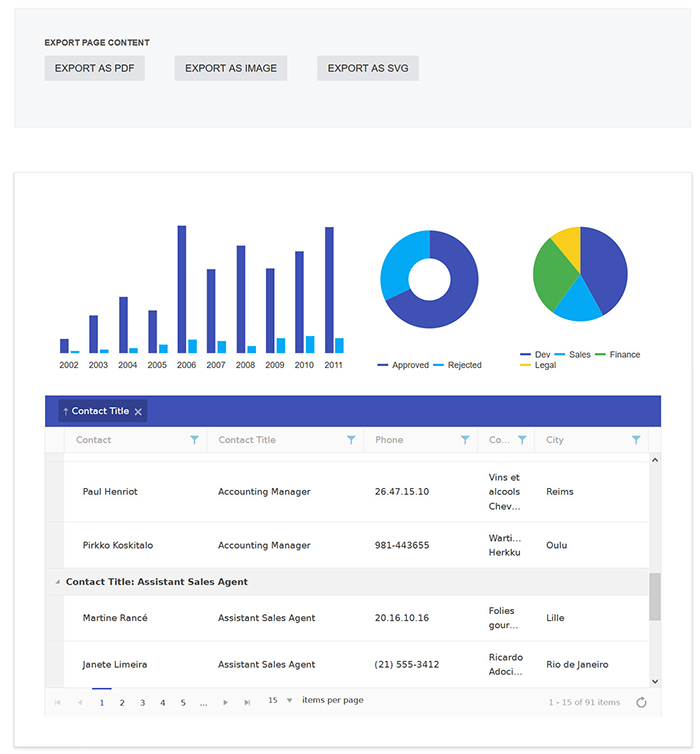
Let's locate the Export AS PDF button export-pdf and attach to the click event.
$(".export-pdf").click(function() { }Next, we'll use the Kendo UI drawing API to capture the elements in the DOM. When we call drawDOM we can target specific elements on the page allowing us to capture the entire page, groups, or single elements. Using the results from drawDOM, the exportPDF function is called creating the PDF file.
$(".export-pdf").click(function() {
    // Convert the DOM element to a drawing using kendo.drawing.drawDOM
    kendo.drawing.drawDOM($(".content-wrapper"))
    .then(function(group) {
        // Render the result as a PDF file
        return kendo.drawing.exportPDF(group, {
            paperSize: "auto",
            margin: { left: "1cm", top: "1cm", right: "1cm", bottom: "1cm" }
        });
    }); }
To prompt the client for a file save the kendo.saveAs function is used with the properties describing the file.
$(".export-pdf").click(function() {
    // Convert the DOM element to a drawing using kendo.drawing.drawDOM
    kendo.drawing.drawDOM($(".content-wrapper"))
    .then(function(group) {
        // Render the result as a PDF file
        return kendo.drawing.exportPDF(group, {
            paperSize: "auto",
            margin: { left: "1cm", top: "1cm", right: "1cm", bottom: "1cm" }
        });
    })
    .done(function(data) {
        // Save the PDF file
        kendo.saveAs({
            dataURI: data,
            fileName: "HR-Dashboard.pdf",
            proxyURL: "https://demos.telerik.com/kendo-ui/service/export"
        });
    });
});
With a single button click the user is now able to export the dashboard directly to PDF. Now the view they created in the dashboard can be shared with team members via email or printed for an important meeting.
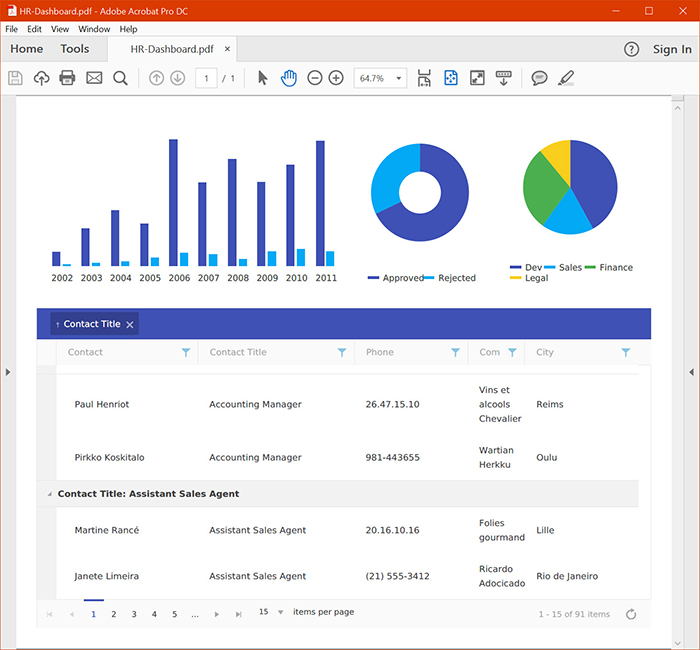
In this example we used ASP.NET Core, but Kendo UI can be utilized across a wide range of platforms to enable users to export web content.
Conclusion
Whether you need to create documents from scratch, edit in the browser or capture directly from the screen, the Telerik UI libraries make short work of any document export task for .NET developers. With the Telerik Document Processing Library new files can be created from scratch as DOCX, PDF, RTF, or TXT. Advanced features such as mail merge can reduce manual tasks with app driven automation. With the addition of Telerik UI libraries powered by Kendo UI, documents can be edited on screen and custom export features empower users to export content with the click of a button.
Get access to the vast benefits of Telerik Document Processing and client-side exporting by downloading either the full[Telerik (formerly DevCraft)] bundle or any technology-specific library you need: (http://www.telerik.com/devcraft) UI for ASP.NET AJAX, UI for ASP.NET MVC or UI for ASP.NET Core client-side only.
Related resources
- The Command Line Reinvented for Modern Developers (whitepaper)
- ASP.NET Core MVC Changes Every Developer Should Know (whitepaper)
- Exporting HTML From Web App to Image (article)
- Exporting Content from JavaScript Apps (webinar)


Ed Charbeneau
Ed
Related Posts
Comments
All articles
Topics
Latest Stories
in Your Inbox
Subscribe to be the first to get our expert-written articles and tutorials for developers!
All fields are required