
Kendo UI MVC Scaffolding Vs. Unrealistic Deadlines

You have deadlines and deliverables. Your boss does not understand the intricate complexities of the ASP.NET MVC web application you are building. You get asked for a quick display of a custom data on web pages, and heck, they even want data editing options. And all this should be done by the end of the day Friday!
You have always loved Kendo UI-powered UI web widgets, but you know it takes time to build the bridge between your custom data objects and actually displaying it via the MVC controllers. Supporting CRUD (Create, Read, Update, Delete) operations on the data all the way back to your repositories is a whole other issue.
Relax. Allow Telerik UI for ASP.NET MVC to help. With the new developer-friendly MVC scaffolding, it is drop-dead easy to hook up your custom data to MVC UI controls and even support CRUD operations out of the box. Yes, you can deliver by Friday and get out to enjoy summer this next weekend. Let this article show you how!
Why Scaffolding?
UI for ASP.NET MVC is a UI suite for web developers, offering over 70 UI widgets and framework pieces, all powered by Kendo UI. You don't need to write HTML/JS on the client-side; you get easy MVC server wrappers that you can simply drop in your MVC views and they render clean markup for UI widgets.
But, UI for ASP.NET MVC is actually much more than server-side wrappers for Kendo UI widgets. It is squarely designed for ASP.NET MVC developers, and as such, makes no qualms about utilizing the richness of the Visual Studio ecosystem.
One feature that MVC developers are quite used to is scaffolding. Visual-Studio-powered MVC scaffolding is a code generation framework that allows you to hook up your model to a controller and render views that are strongly typed, among other things. It has been proven over years that developers enjoy scaffolding features and now your Telerik UI for ASP.NET MVC suite boasts of some very slick scaffolding utilities.
The Model
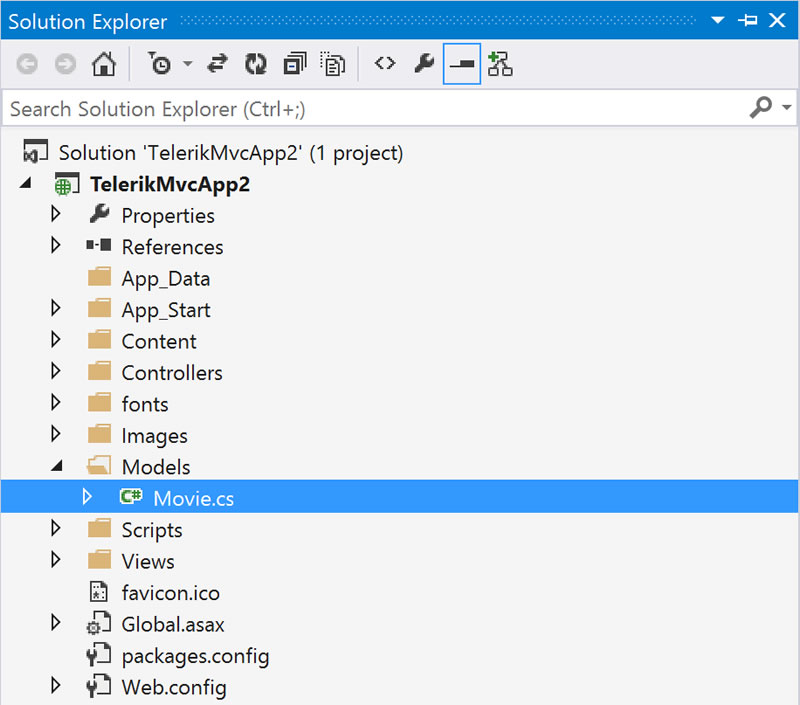
Seeing is believing, right? Let's say you begin with the default ASP.NET MVC project template and add a Movie Model, as shown below, along with the custom Movie class.
public class Movie
{
    public int ID { get; set; }
    public string Title { get; set; }
    public DateTime ReleaseDate { get; set; }
    public string Genre { get; set; }
    public decimal Price { get; set; }
}
The Collection
Although it is super-simplified, the Movie class represents your real-world custom business object. Typically, you'd have a collection of items that you want to display in your application. The next step would be to define a collection that holds a list of Movie objects – this can be achieved easily using the DBContext class in Entity Framework.
using System;
using System.Collections.Generic;
using System.Linq;
using System.Web;
using System.Data.Entity;

namespace TelerikMvcApp2.Models
{
    public class Movie
    {
        public int ID { get; set; }
        public string Title { get; set; }
        public DateTime ReleaseDate { get; set; }
        public string Genre { get; set; }
        public decimal Price { get; set; }
    }

    public class MovieDBContext : DbContext
    {
        public DbSet<Movie> Movies { get; set; }
    }
}
This DBContext collection of Movies can be instantiated and hooked up to just about any data source – local, remote or relational storage.
Now that you have a collection of Movies, you may want to display them in your web application through a polished MVC UI control. Not to mention your boss is breathing down your neck wanting data editing features immediately. This is where the new Kendo UI MVC Scaffolders can swoop in to help.
How to Scaffold
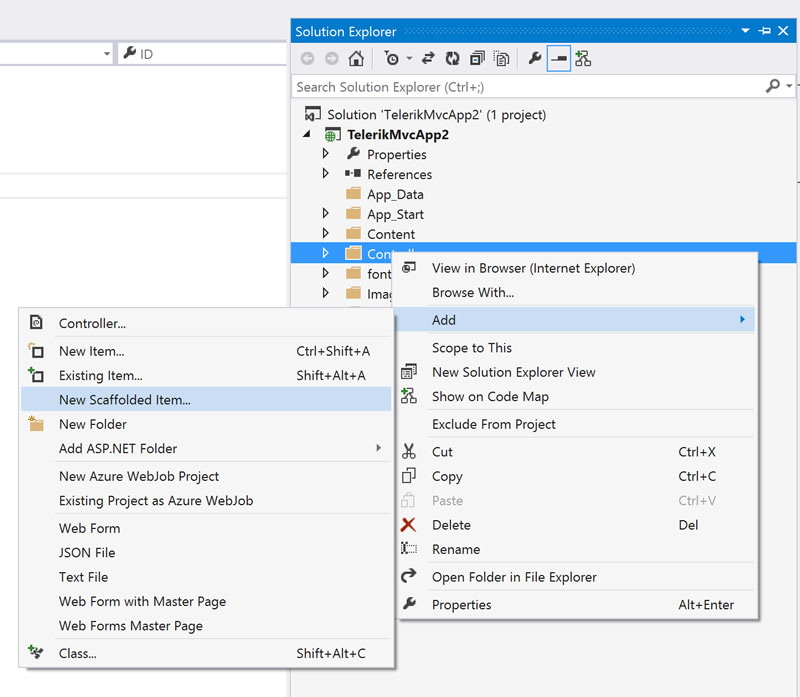
Assuming you have the latest UI for ASP.NET MVC bits (Q2 2015 release) installed and properly referenced in your MVC project, you should be ready to try out scaffolding with the newly defined Movie class and the MovieDBContext collection. Simply right-click on your Controllers folder, then choose Add and New Scaffolded Item, as shown below.
The Scaffolder
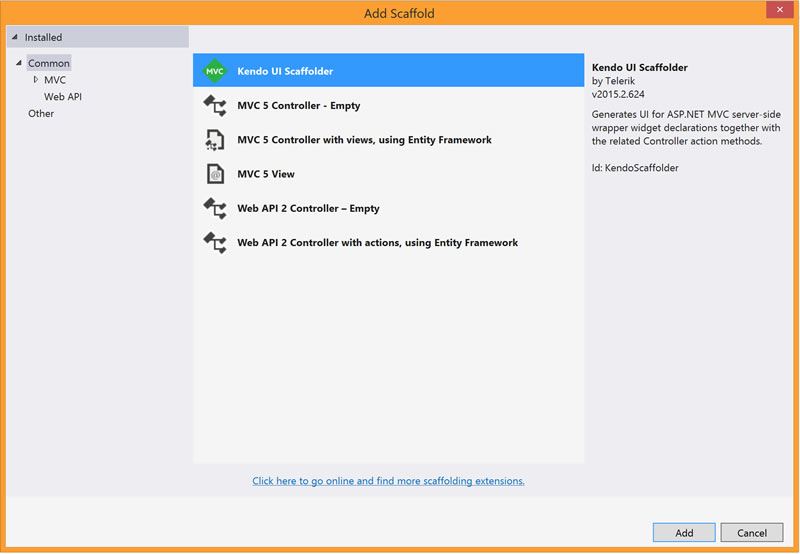
The wizard shows you what you're after. Among other MVC and Web API options, you see the new Kendo UI Scaffolder (shown below).
Choose the Kendo UI Scaffolder and hit Next. The next screen in the wizard allows you to pick which Kendo UI widget (through MVC control) you want to scaffold, as seen below.
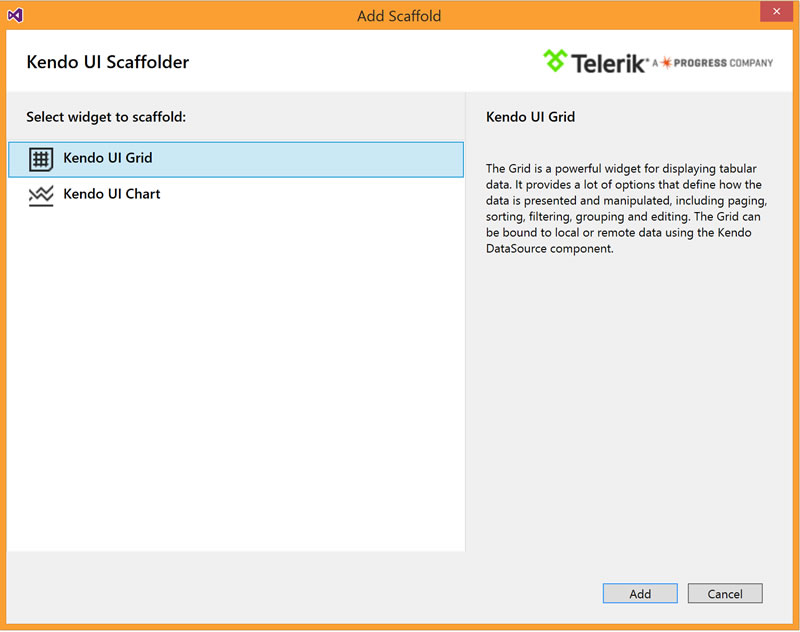
Your choices of widgets to scaffold include the Kendo UI Grid and the Kendo UI Chart – both enterprise-friendly UI controls (scaffolding support for Kendo UI Scheduler is coming very soon). Don't let the single Kendo UI Chart option fool you – you can wire up and render almost any type of Kendo UI Chart through the scaffolding.
The goal with these scaffolding tools is to allow you to quickly render complex Kendo UI widgets that are strongly typed to your data Model of choice. You also get some additional bells and whistles.
The Wizard
Say you want to render your collection of Movies as a Kendo UI Grid - you'll pick the Kendo UI Grid option from the scaffolding wizard. The next step allows you to name your new controller and view, and hook them up to an existing model with its corresponding DataContext - the Movie model and the MovieDBContext in this case.
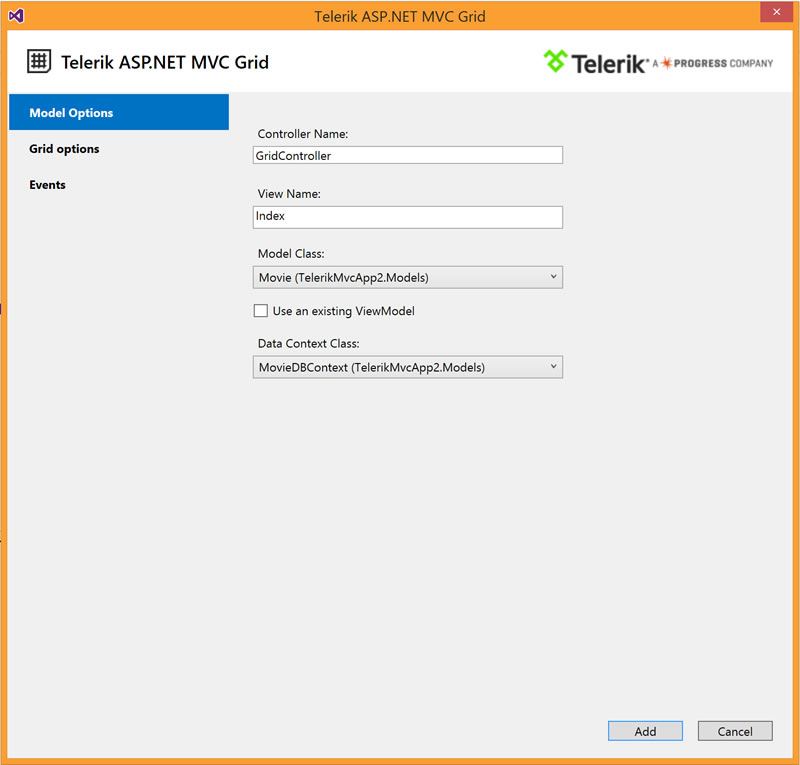
The model hook-up allows the controller and view to be strongly typed, while the DataContext aids in performing CRUD operations back to the data source. You may also choose to use a ViewModel – especially when you want your controller to only handle a subset of the data exposed by your data model.
When the wizard finishes its little magic, you'll notice corresponding new files added to your controllers and views folders.
Since you are about to render a Kendo UI Grid that is hooked up to your data Model, the other aspect of the Kendo UI Scaffolder wizard that you'll appreciate is the grid configurability. Simply click on Grid Options – and you can configure your rendered Grid to your heart's content.
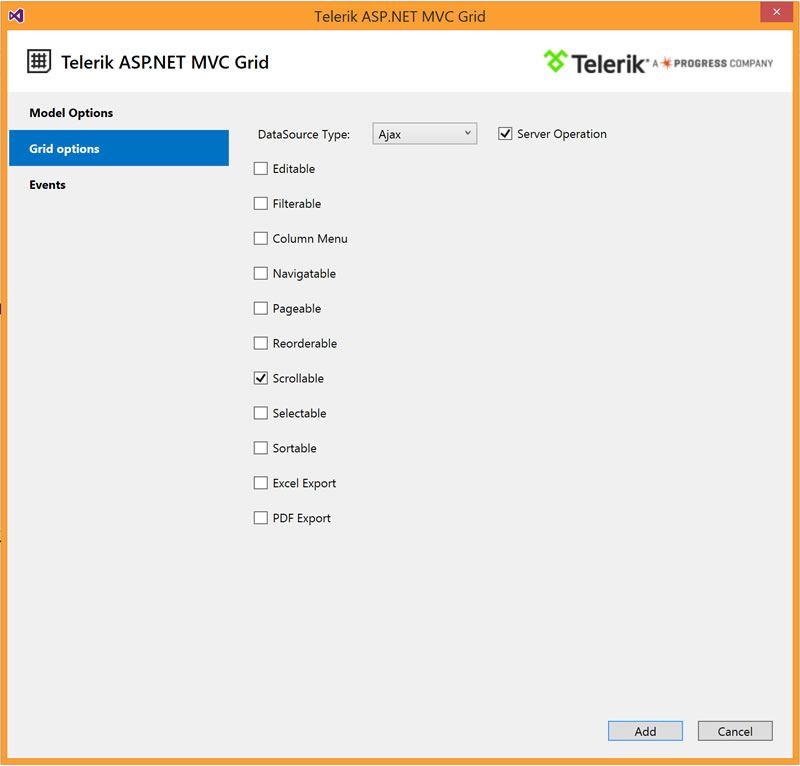
As you can see, most aspects of how your grid behaves (sorting, filtering, paging and export options) can be configured visually through the scaffolding wizard.
But what if you wanted to allow data edits directly from your rendered Grid? Simple – click on the Editable checkbox, and voila, there are your options! You get to control the Edit Mode (Inline, Pop-Up and Batch) as well as the allowed CRUD operations, as seen in screenshot below.

What's Created
When you are finished with the Kendo UI Scaffolder wizard, you'll have corresponding files added to your controllers and views folder with everything hooked up to your model and configured as per your specifications. Since the scaffolding is simply a code generation tool, you are free to change any of the code that it generated.
First, have a look at the controller that was created for you – you'll find it in the controllers folder with whatever name you gave it. You should see code similar to this:
namespace TelerikMvcApp2.Controllers
{
    public class GridController : Controller
    {
        private MovieDBContext db = new MovieDBContext();

        public ActionResult Grid()
        {
            return View();
        }

        public ActionResult Movies_Read([DataSourceRequest]DataSourceRequest request)
        {
            IQueryable<Movie> movies = db.Movies;
            DataSourceResult result = movies.ToDataSourceResult(request, movie => new {
                ID = movie.ID,
                Title = movie.Title,
                ReleaseDate = movie.ReleaseDate,
                Genre = movie.Genre,
                Price = movie.Price
            });

            return Json(result);
        }

        protected override void Dispose(bool disposing)
        {
            db.Dispose();
            base.Dispose(disposing);
        }
    }
}
As you can see, the controller is aware of your model and DataContext – the Movies and the MoveDBContext in this case. There is a Read ActionResult that runs a standard LINQ query against your DataContext and returns JSON data back to your corresponding View.
CRUD Support
Now being able to read data off your Model is easy - but what about CRUD operations? If you had indeed gone through the Kendo UI Scaffolder wizard and made your grid editable, you'd expect CRUD support out-of-the-box, right? Roger that.
The Scaffolder handles this for you. Take a closer look at the generated code in your new controller. You'll see Create ActionResult that adds a new Movie to your collection.
[AcceptVerbs(HttpVerbs.Post)]
public ActionResult Movies_Create([DataSourceRequest]DataSourceRequest request, Movie movie)
{
    if (ModelState.IsValid)
    {
        var entity = new Movie
        {
            Title = movie.Title,
            ReleaseDate = movie.ReleaseDate,
            Genre = movie.Genre,
            Price = movie.Price
        };

        db.Movies.Add(entity);
        db.SaveChanges();
        movie.ID = entity.ID;
    }

    return Json(new[] { movie }.ToDataSourceResult(request, ModelState));
}
You also get an Update ActionResult that modifies an existing Movie in the collection, as below:
[AcceptVerbs(HttpVerbs.Post)]
public ActionResult Movies_Update([DataSourceRequest]DataSourceRequest request, Movie movie)
{
    if (ModelState.IsValid)
    {
        var entity = new Movie
        {
            ID = movie.ID,
            Title = movie.Title,
            ReleaseDate = movie.ReleaseDate,
            Genre = movie.Genre,
            Price = movie.Price
        };

        db.Movies.Attach(entity);
        db.Entry(entity).State = EntityState.Modified;
        db.SaveChanges();
    }

    return Json(new[] { movie }.ToDataSourceResult(request, ModelState));
}
And finally, a Destroy ActionResult that deletes an existing Movie from the collection, like so:
[AcceptVerbs(HttpVerbs.Post)]
public ActionResult Movies_Destroy([DataSourceRequest]DataSourceRequest request, Movie movie)
{
    if (ModelState.IsValid)
    {
        var entity = new Movie
        {
            ID = movie.ID,
            Title = movie.Title,
            ReleaseDate = movie.ReleaseDate,
            Genre = movie.Genre,
            Price = movie.Price
        };

        db.Movies.Attach(entity);
        db.Movies.Remove(entity);
        db.SaveChanges();
    }

    return Json(new[] { movie }.ToDataSourceResult(request, ModelState));
}
All of the above support CRUD operations would be code that you would have to hand-write. Instead, the Kendo UI Scaffolder generates standard LINQ-based boilerplate code to get you a step ahead with supporting CRUD operations from your data Model.
Don't like something? Just change it. Also, keep in mind that these CRUD operations will not only change your Data Model held in memory, but also update the data back in your backend data repository through your chosen data access strategy. This could be your local collection, a relational database or a remote service – all supported seamlessly.
The View
And finally, take a look at the Razor view from where your rendered Grid will come to life. It should be in the Views folder with the same name as your controller (by convention) and you should see code like the following:
@(Html.Kendo().Grid<TelerikMvcApp2.Models.Movie>()
      .Name("grid")
      .Columns(columns =>
      {
        columns.Bound(c => c.Title);
        columns.Bound(c => c.ReleaseDate);
        columns.Bound(c => c.Genre);
        columns.Bound(c => c.Price);
        columns.Command(command => { command.Edit(); command.Destroy(); }).Width(180);
      })
      .ToolBar(toolbar => {
            toolbar.Create();
      })
      .Editable(editable => editable.Mode(GridEditMode.PopUp))
      .Scrollable()
      .DataSource(dataSource => dataSource
          .Ajax()
          .Model(model => model.Id(p => p.ID))
          .Read(read => read.Action("Movies_Read", "Grid"))
          .Create(create => create.Action("Movies_Create", "Grid"))
          .Update(update => update.Action("Movies_Update", "Grid"))
          .Destroy(destroy => destroy.Action("Movies_Destroy", "Grid"))
      )
)
Notice how the code is simply using the MVC wrapper to render the corresponding Kendo UI Grid that is strongly typed to your Model, while remembering all of the grid configuration options you chose from the Scaffolder wizard. The MVC wrapper also makes heavy use of the Kendo UI DataSource and each of the supported CRUD operations are neatly hooked up to the corresponding ActionResults you saw in the controller code. Everything is wired up and ready to go.
Conclusion
If you are an ASP.NET MVC developer with custom data that you want rendered as Kendo UI widgets, you owe it to yourself to take a look at the new Kendo UI Scaffolders. The goal is to jumpstart your effort with auto-generated custom code that wires up your Controller and View to an existing Model and DataContext. Along the way, you get an easy UI that allows you to configure the UI controls you are rendering, as well as set up CRUD operations on your data. The Scaffolder just wants to see you happy and delivering your project successfully, before getting out of work ahead of time next Friday. Cheers to that!

Sam Basu
Sam Basu is a technologist, author, speaker, Microsoft MVP, gadget-lover and Progress Developer Advocate for Telerik products. With a long developer background, he now spends much of his time advocating modern web/mobile/cloud development platforms on Microsoft/Telerik technology stacks. His spare times call for travel, fast cars, cricket and culinary adventures with the family. You can find him on the internet.
Related Posts
Comments
All articles
Topics
Latest Stories
in Your Inbox
Subscribe to be the first to get our expert-written articles and tutorials for developers!
All fields are required