
Exporting Data with Ease Using Kendo UI Grid

Kendo UI Grid is one of the most popular grid options available in the JavaScript world. With just 5 to 10 lines of code you can get a complete grid with paging, sorting, filtering, grouping & editing. But there was one feature that almost every user of Kendo UI wanted to be supported out of the box – exporting the grid data to either Excel or PDF.
With the release of Kendo UI Q3 2014, data export is a built-in feature of Kendo UI Grid. What this means is that, with just a property set on the grid, you can turn on the data export. At this moment it supports exporting grid data to Excel and PDF only.
What's great is the fact that these exports are all happening within the browser and no server invocation is required. If you are itching to test this out, go grab the latest release of Kendo UI and follow along as I'll give you a lap around how to export the data from Kendo UI Grid and the export options that are available for you as a developer.
Creating a Grid
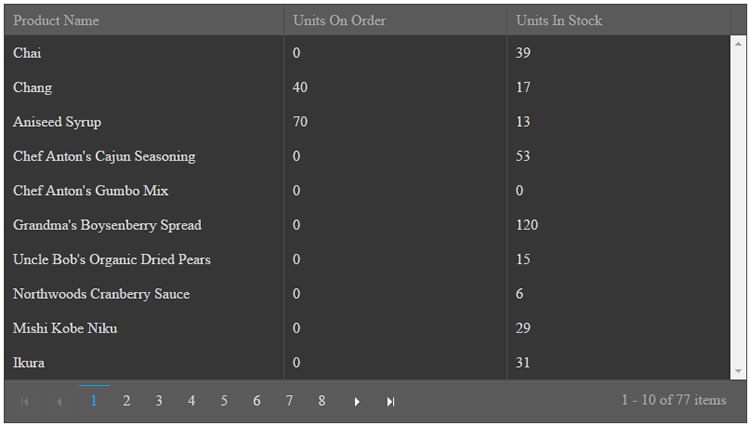
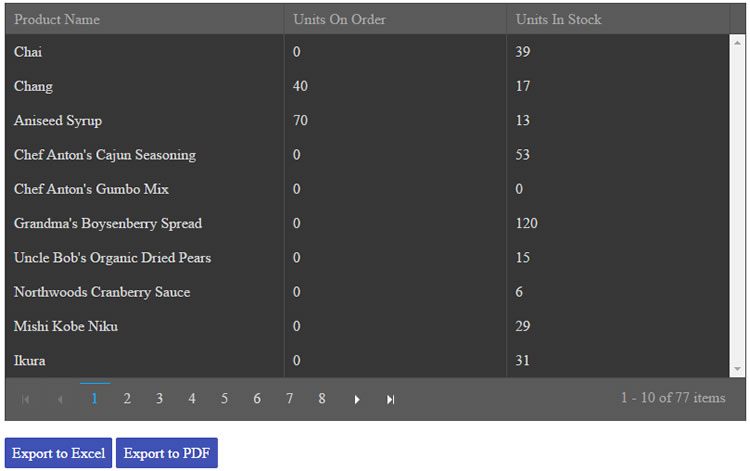
First, let's create a simple Kendo UI Grid, which we'll connect to one of our demo services based on the Northwind database. We'll use the Products table and display Product Name, Units on Order and Units in Stock with a page size of 10. Below is the code snippet for the grid:
<div id="grid"></div>
<script>
    $("#grid").kendoGrid({
        dataSource: {
            type: "odata",
            transport: {
                read: "http://demos.telerik.com/kendo-ui/service/Northwind.svc/Products"
            },
            pageSize: 10
        },
        sortable: true,
        pageable: true,
        columns: [
            { width: 300, field: "ProductName", title: "Product Name" },
            { field: "UnitsOnOrder", title: "Units On Order" },
            { field: "UnitsInStock", title: "Units In Stock" }
        ]
    });
</script>
The above code snippet generates a grid like the one pictured below:
Providing Export Options on the Grid
Now we get to the interesting part – exporting data. In this section we will look at how to set up the grid for Excel and PDF data export.
Before we enable the export feature there is one prerequisite we need to take care of. This prerequisite supports the Excel export. Excel exporting depends on a JavaScript library called JSZip, which is part of the Kendo UI distribution. So before we proceed any further, make sure you have a reference to JSZip script file.
Add the CDN link to the JSZip script file to the grid page:
<script src="http://cdn.kendostatic.com/2014.3.1029/js/jszip.min.js"></script>
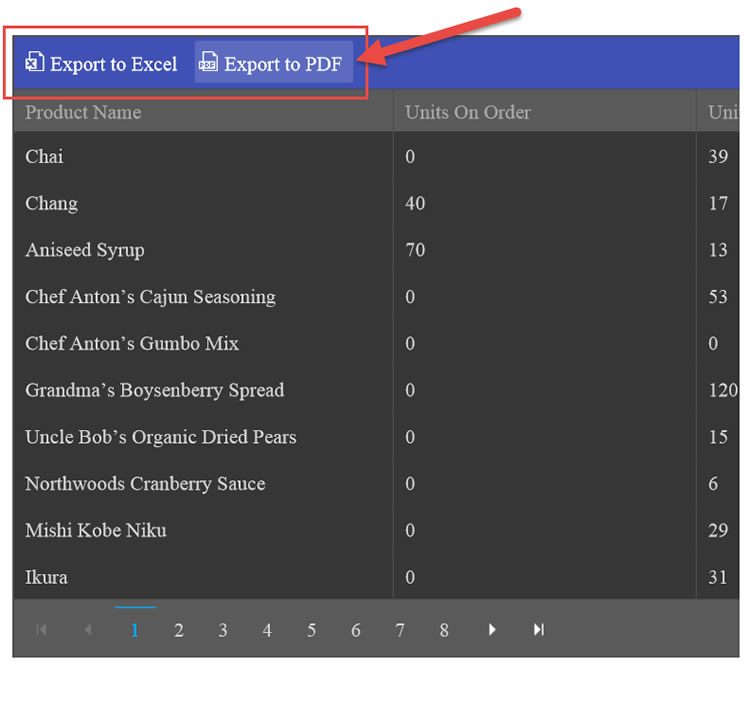
One of the easiest ways to configure export options on the grid is to use the built-in toolbar action buttons. If you have used the Kendo UI Grid before, you will be familiar with the Toolbar which is used to provide grid level options such "Add New Row" or "Save Changes," among others. Similarly, the Kendo UI Grid provides two commands or actions for Excel/PDF exports that can be enabled on the toolbar itself.
With just one setting, you can automatically enable an export functionality on your grid. Let's take a look at the code snippet showing how to set the toolbar command:
<div id="grid"></div>
<script>
    $("#grid").kendoGrid({
        toolbar:["excel","pdf"],
        dataSource: {
            type: "odata",
            transport: {
                read: "http://demos.telerik.com/kendo-ui/service/Northwind.svc/Products"
            },
            pageSize: 10
        },
        sortable: true,
        pageable: true,
        columns: [
            { width: 300, field: "ProductName", title: "Product Name" },
            { field: "UnitsOnOrder", title: "Units On Order" },
            { field: "UnitsInStock", title: "Units In Stock" }
        ]
    });
</script>
This is what the grid will look like now:
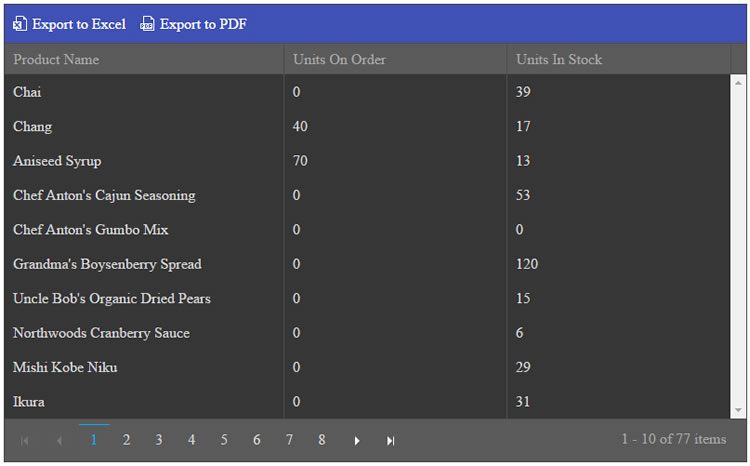
As you can see, we now have 2 toolbar buttons "Export to Excel" and "Export to PDF." That's all that is required to export data from a grid to Excel or PDF.
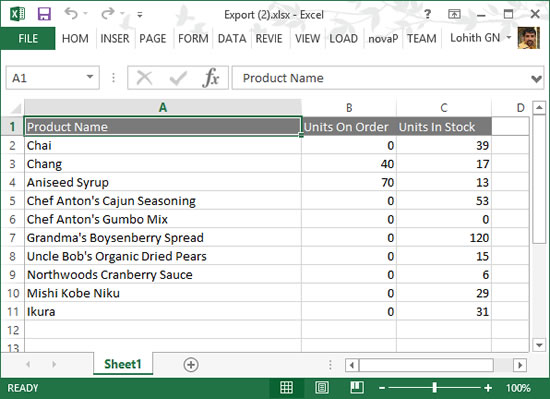
If we go ahead and click on the export buttons, an Excel document and a PDF document will be generated on to your system. Go ahead and give it a try. Here is what the exported Excel document looks on my machine:
It works fine, but did you notice that we have the following problems:
- The export functionality exported only 1 page of the grid;
- The exported file name was set to "Export.xslx" or "Export.pdf";
- What if the browser doesn't support the necessary HTML5 feature?
Let's address these one by one.
Customizing the Exported File
The default behavior of export functionality is to use the first page of the grid while exporting and to use a default name of "Export.<extension>" for the exported file name. If this is not something that you want, don't worry. There are Excel and PDF export options that can be set on the grid itself. The export functionality will respect these custom settings and use them during the export action. Let's see the customization in detail.
Customizing Export to Excel
While enabling export to excel, Kendo UI Grid provides the following options which can be set as part of the Excel property on the grid. The options are:
| Property | Type | Description |
|---|---|---|
| fileName | string | Configure the file name of the exported excel file. Default value is "Excel.xslx" |
| filterable | boolean | Configure whether exported excel file will have column filtering or now. Default value is false |
| allPages | boolean | Configure whether all pages data need to be exported. Default value is false |
Note: When
allPagesis set to true and the Kendo UI Grid is bound to remote data, it will make a server call to get all the data items and then export. This needs to be used with caution when you have large data set.
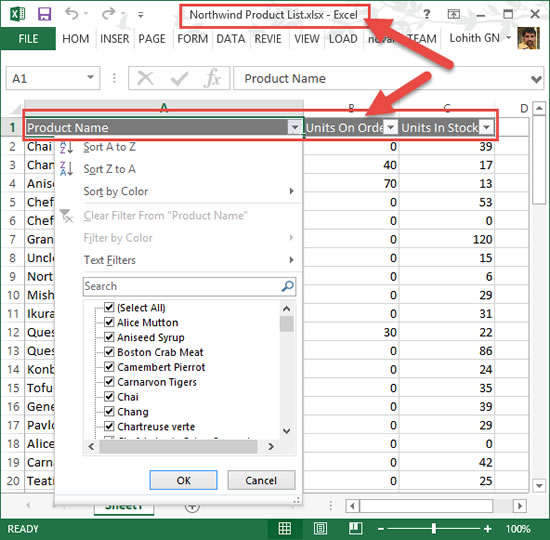
Here is the code snippet to customize the Excel export:
<script>
    $("#grid").kendoGrid({
        toolbar:["excel","pdf"],
        excel:{
            fileName:"Northwind Product List.xlsx",
            allPages:true,
            filterable:true
        },
        dataSource: {
            type: "odata",
            transport: {
                read: "http://demos.telerik.com/kendo-ui/service/Northwind.svc/Products"
            },
            pageSize: 10
        },
        sortable: true,
        pageable: true,
        columns: [
            { width: 300, field: "ProductName", title: "Product Name" },
            { field: "UnitsOnOrder", title: "Units On Order" },
            { field: "UnitsInStock", title: "Units In Stock" }
        ]
    });
</script>
And here is the screenshot of the exported Excel file on my machine:
Customizing Export to PDF
Similar to customizing Excel, we can customize the PDF file options also. The following are the options supported for PDF:
| Property | Type | Description |
|---|---|---|
| author | string | Configure document Author name |
| creator | string | Configure document Creator name |
| date | date | Configure document creation date |
| fileName | string | Configure name of the document |
| keywords | string | Configure document's keywords |
| landscape | string | Configure document paper dimension. Default value is false |
| margin | string | Configure document margin |
| paperSize | string | Configure paper size of the document. For e.g. A4 etc. |
| subject | string | Configure Subject of the document |
| title | string | Configure Title of the document |
Here is a code snippet setting the PDF options for export:
<script>
    $("#grid").kendoGrid({
        toolbar:["excel","pdf"],
        pdf:{
              author:"Lohith G N",
              creator:"Telerik India",
              date:new Date(),
              fileName:"Northwind Product List.pdf",
              keywords:"northwind products",
              landscape:false,
              margin:{
                    left: 10,
                    right: "10pt",
                    top: "10mm",
                    bottom: "1in"
              },
              paperSize:"A4",
              subject:"Northwind Products",
              title:"Northwind Products"
       },
        dataSource: {
            type: "odata",
            transport: {
                read: "http://demos.telerik.com/kendo-ui/service/Northwind.svc/Products"
            },
            pageSize: 10
        },
        sortable: true,
        pageable: true,
        columns: [
            { width: 300, field: "ProductName", title: "Product Name" },
            { field: "UnitsOnOrder", title: "Units On Order" },
            { field: "UnitsInStock", title: "Units In Stock" }
        ]
    });
</script>
Programmatically Export Excel/PDF Document
So far, we have seen how easy it is to provide the export functionality using the built in Toolbar commands of the Kendo UI Grid. But if you have opened the exported PDF document, you will notice that the document contains the toolbar with the Export to Excel and PDF buttons intact.
If you don't want to see the buttons in an exported document, the toolbar command way of exporting the data may not be the ideal. Luckily, the Kendo grid provides two methods, saveAsExcel() and saveAsPDF() to programmatically invoke an export command on the grid.
In order to showcase the programmatic export, we will place two buttons below the grid and we will wire up the click event to call the export functions.
Below is the code snippet to add the buttons below the grid:
<div id="grid"></div>
<br>
<button class="k-button k-primary" id="btnExcelExport">Export to Excel</button>
<button class="k-button k-primary" id="btnPdfExport">Export to PDF</button>

<script>
    $("#btnExcelExport").kendoButton({
      click:function(){
        $("#grid").getKendoGrid().saveAsExcel();
      }
    });

  $("#btnPdfExport").kendoButton({
      click:function(){
        $("#grid").getKendoGrid().saveAsPDF();
      }
    });

    $("#grid").kendoGrid({
      excel:{
            fileName:"Northwind Product List.xlsx",
            allPages:true,
            filterable:true
        },
      pdf:{
              author:"Lohith G N",
              creator:"Telerik India",
              date:new Date(),
              fileName:"Northwind Product List.pdf",
              keywords:"northwind products",
              landscape:false,
              margin:{
                    left: 10,
                    right: "10pt",
                    top: "10mm",
                    bottom: "1in"
              },
              paperSize:"A4",
              subject:"Northwind Products",
              title:"Northwind Products"
       },
        dataSource: {
            type: "odata",
            transport: {
                read: "http://demos.telerik.com/kendo-ui/service/Northwind.svc/Products"
            },
            pageSize: 10
        },
        sortable: true,
        pageable: true,
        columns: [
            { width: 300, field: "ProductName", title: "Product Name" },
            { field: "UnitsOnOrder", title: "Units On Order" },
            { field: "UnitsInStock", title: "Units In Stock" }
        ]
    });
</script>
This is how the UI should look now:
In the button click event, I grab an instance of the grid and invoke the appropriate save method. Now if we take a look at the exported PDF document, we will see only the grid and no buttons as before.
What About Browser Support?
Kendo UI Grid data export feature makes uses of the client side File API in browsers to save the file. The browsers that support the necessary API are IE10+, Google Chrome and Firefox. However, if the browser doesn't implement file save API, the grid provides a fallback mechanism.
If you provide a server side proxy URL where the file content can be posted, you convert the file on the server and stream it back to end user. Both the Excel and PDF options provide a property called "proxyURL" as seen in the code snippet below:
<div id="grid"></div>
<br>
<button class="k-button k-primary" id="btnExcelExport">Export to Excel</button>
<button class="k-button k-primary" id="btnPdfExport">Export to PDF</button>

<script>
    $("#btnExcelExport").kendoButton({
      click:function(){
        $("#grid").getKendoGrid().saveAsExcel();
      }
    });

  $("#btnPdfExport").kendoButton({
      click:function(){
        $("#grid").getKendoGrid().saveAsPDF();
      }
    })

    $("#grid").kendoGrid({
      excel:{
            fileName:"Northwind Product List.xlsx",
            allPages:true,
            filterable:true,
                proxyURL: "http://demos.telerik.com/kendo-ui/service/export",
        },
      pdf:{
              author:"Lohith G N",
              creator:"Telerik India",
              date:new Date(),
              fileName:"Northwind Product List.pdf",
              keywords:"northwind products",
              landscape:false,
              margin:{
                    left: 10,
                    right: "10pt",
                    top: "10mm",
                    bottom: "1in"
              },
              paperSize:"A4",
              subject:"Northwind Products",
              title:"Northwind Products",
                proxyURL: "http://demos.telerik.com/kendo-ui/service/export",
       },
        dataSource: {
            type: "odata",
            transport: {
                read: "http://demos.telerik.com/kendo-ui/service/Northwind.svc/Products"
            },
            pageSize: 10
        },
        sortable: true,
        pageable: true,
        columns: [
            { width: 300, field: "ProductName", title: "Product Name" },
            { field: "UnitsOnOrder", title: "Units On Order" },
            { field: "UnitsInStock", title: "Units In Stock" }
        ]
    });
</script>
The server side proxy implementation is pretty simple. The proxy will receive a POST request with the following parameters in the request body:
contentType: The MIME type of the file;base64: The base-64 encoded file content;fileName: the file name as set in the export option.
The proxy should just return the decoded file and set the "Content-Disposition" header. For example, here is a proxy implementation in ASP.NET MVC:
public class HomeController
{
    [HttpPost]
    public ActionResult Save(string contentType, string base64, string fileName)
    {
        var fileContents = Convert.FromBase64String(base64);

        return File(fileContents, contentType, fileName);
    }
}
With this fall back mechanism, the export can be made to work even on browsers that don't support the necessary HTML5 API, allowing you to cover all the browsers with respect to file export.
Conclusion
Hopefully you've seen how easy and flexible the new export capability is in the Kendo UI DataGrid and are excited to try out this feature. Do give it a spin and let us know if you have any feedback or suggestions for us.
If you'd like to try a demo of the examples presented here, you can find it on the Kendo UI Dojo here.
Header image courtesy of Alias 0591

The Telerik Team
Comments
All articles
Topics
Latest Stories
in Your Inbox
Subscribe to be the first to get our expert-written articles and tutorials for developers!
All fields are required