
Build Your First Google Wear App

Ever since Google introduced Google Wear as a developer preview on March 18, 2014, we've seen an explosion of wear apps in the Google Play store. Everything from new watch faces that turn your watch into a "$10K Rolex," to apps that help you catch a taxi or train without pulling out your phone. Even the major brands such as Delta are putting boarding passes on your watch.
With all of the new watch partners like Samsung, LG and Motorola, we have plenty of devices and, more importantly we're starting to get users to develop apps for. In this tutorial, we will take a look at creating our first Google Wear App to help kickstart your development efforts in this space.
Our Google Wear App
The app we are going to build today is a tip calculator with a twist. Instead of manually entering the bill amount on a tiny screen, we are going to use speech recognition to input a whole number. It is going to multiply the whole number times 15 percent (standard tip) and display the total bill amount on your watch. We will be able to do all of this with the following command, "OK, Google Open Wearable Tip". Once the app has launched, we will simply say a whole number (such as 20 for example).
Grab the Bits
To follow along with this tutorial, make sure you are using the latest stable release of Android Studio. At the time of this writing, I'm using 1.1.0. Also make sure you have installed the Android 5.0.1 SDK Platform as well as the Android Wear System image (in case you don't have a watch) as shown below:
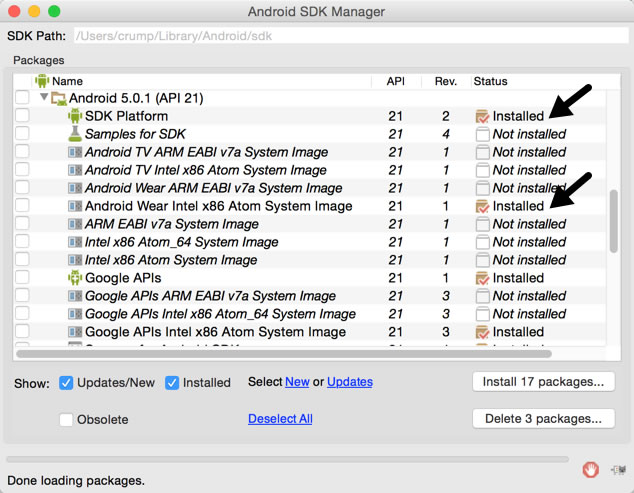
Once everything is installed, then you are ready to create your first wear app!
Getting Started
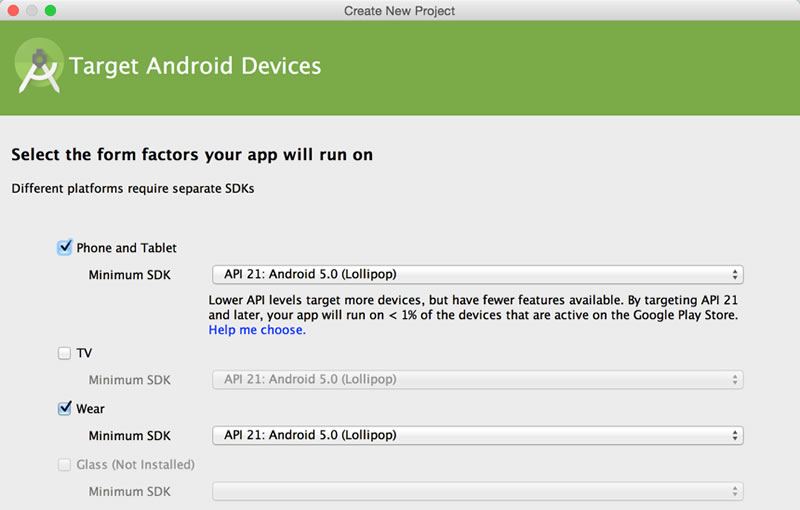
We'll begin by starting a new project and giving it a name and then selecting both "Phone and Tablet" and "Wear" form factors as shown below. Please note that for the "Phone and Tablet" app, you can select a lower API level such as 9, whereas with the "Wear" app, you must be using API 20 (KitKat 4.4) and up. I have a Moto 360 watch for testing that has been upgraded to 5.0.1, so we'll be using API 21 in this tutorial.
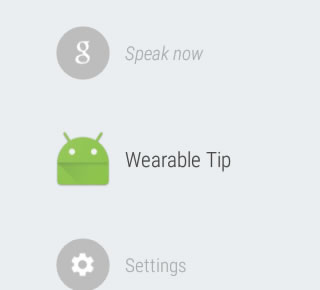
One thing to note here before moving on is that you need to create a Phone and Tablet app in order to create a Android Wear app. This is just like iOS, where you must have a phone app to create an Apple Watch app. In other words, the android wear app will be packaged into an APK file in the mobile app that will be deployed on the watch itself. Below is a screenshot from my Moto 360 watch that has the app installed.
Go ahead and finish the template and add blank activities until your project is loaded. You will notice that it splits the projects into two folders:
- mobile - our phone and tablet app
- wear - our watch app
We are going to focus on the wear app in this tutorial, so expand the folders until it looks like the image below:
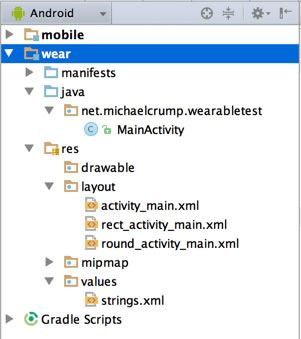
Pay special attention to the following four files:
MainActivity.java- is the code that launches upon first boot and where we will be adding our code.rect_activity_main.xml- is our user interface for the watches that use a Rectangle screen (like the LG watch).round_activity_main.xml- is our user interface for the watches that use a Round screen. (like the Moto 360)strings.xml- is where we will store our string values to make it easier to localize our app.
Creating our UI
Let's begin by creating our user interface for the Round Watch as we will be testing this on a Moto 360 shortly. Click on round_activity_main.xml and you will notice that it already has a TextView widget that displays the text, "Hello Round World".
Switch the device preview to "Wear Round" and drag a Small Button widget and give it the text of "Another?". Center it in the screen and set the onClick method name (in the properties panel) to onClickMe. It should look like the following screenshot now:
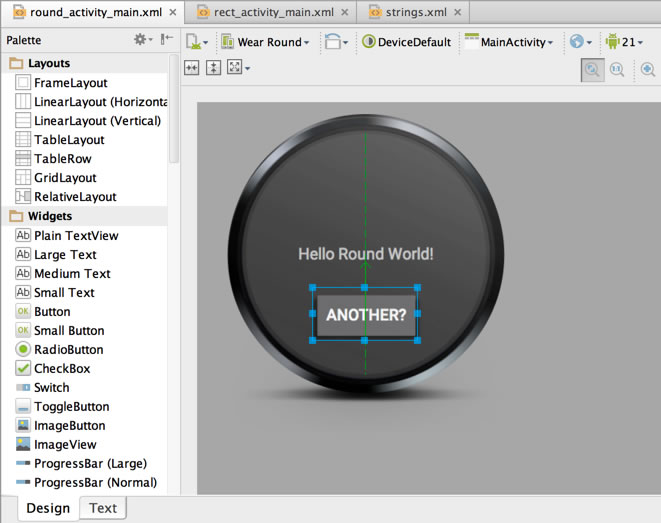
Do the same exact thing for rect_activity_main.xml and preview it with the "Wear Square" device.
To keep the app simple, we will reuse the TextView widget to display the total bill amount. The button that says "Another?" will allow the end user to calculate another tip using speech recognition.
Writing the Logic
Head over to the MainActivity.java file and add the following import statements that we will use shortly.
import android.content.Intent;
import android.speech.RecognizerIntent;
import java.util.List;
import java.text.NumberFormat;MainActivity class. This will be for the Speech Recognizer class provided by Google and the tip percent amount.
private static final int SPEECH_RECOGNIZER_REQUEST_CODE = 0;
private float tipPercent = .15f;Intent that starts the Speech Recognizer.
private void startSpeechRecognition() {
    Intent intent = new Intent(RecognizerIntent.ACTION_RECOGNIZE_SPEECH);
    intent.putExtra(RecognizerIntent.EXTRA_LANGUAGE_MODEL,      RecognizerIntent.LANGUAGE_MODEL_FREE_FORM);
    startActivityForResult(intent, SPEECH_RECOGNIZER_REQUEST_CODE);
}Activity result. If it determines that it captured your voice input successfully, then it tries to convert it to a float. If it is successful, then it calculates the total amount and displays it in the label, or else it updates the label with the phrase, "Enter a whole number".
@Override
protected void onActivityResult(int requestCode, int resultCode, Intent data) {
    if (requestCode == SPEECH_RECOGNIZER_REQUEST_CODE) {
        if (resultCode == RESULT_OK) {
            List<String> results = data.getStringArrayListExtra(RecognizerIntent.EXTRA_RESULTS);

            String recognizedText = results.get(0);
            //Try to extract the total bill amount in a whole number

            try {
                float billAmount = Float.parseFloat(recognizedText);
                // calculate tip and total
                float tipAmount = billAmount * tipPercent;
                float totalAmount = billAmount + tipAmount;

                // Display the tip on the watch
                NumberFormat currency = NumberFormat.getCurrencyInstance();
                mTextView.setText(currency.format(totalAmount));
            }
            catch(NumberFormatException ex) {
                mTextView.setText("Enter a whole number!");
            }
        }
    }
    super.onActivityResult(requestCode, resultCode, data);
}startSpeechRecognition method on the last line of our OnCreate method and wire it up to the button we created earlier.
public void onClickMe(View view){
    startSpeechRecognition();
}
Testing our App
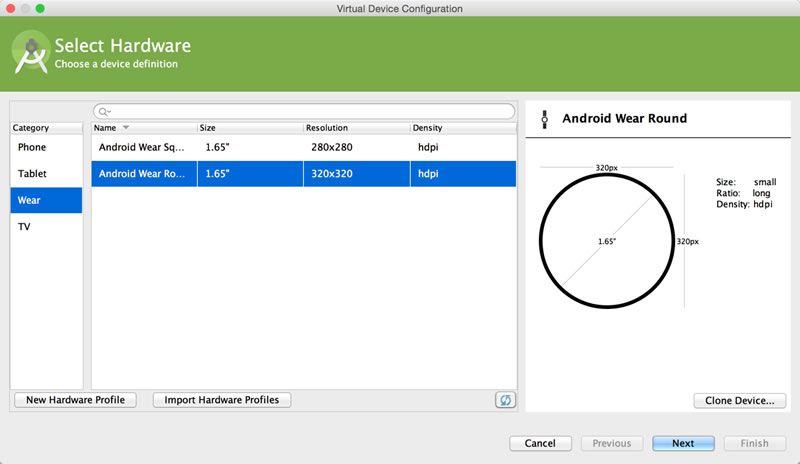
With the UI and code in place, you are probably eager to run the app. You have a few options. You can create an AVD (Android Virtual Device) for Android Wear as shown below, but it won't pick up your voice through the computer's microphone.
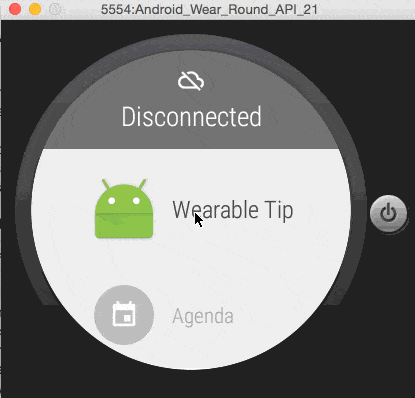
It will automatically add support for your keyboard when creating the AVD. This will allow you to type the number as shown below.
Since I have an actual device and would like to test the speech recognition part of the app, I'm going to deploy it to my watch.
Deploying to our Device
Depending on which watch you have, you may or may not have a USB connection. In my case, I'm testing on a Moto 360 which only allows debugging over bluetooth. Thankfully, this is easy to setup with the documentation that Google provides.
I would say the only tricky step is finding where the Android Debug Bridge lives on a Mac and adding that to your .bash_profile for later use. On a Windows box, this doesn't seem to be an issue.
Here's an easy way to fix this on a Mac:
- Open Terminal on Mac
cd ~$(to get to my home directory)open -e .bash_profile(to add a path to the adb)- Add:
Make sure to change the username (i.e. "crump" in my case) to your own. Save the file.export PATH=$PATH:/Users/crump/Library/Android/sdk/platform-tools/ echo $PATHshould return:/usr/local/bin:/usr/bin:/bin:/usr/sbin:/sbin:/Users/crump/Library/Android/sdk/platform-tools/adb versionshould return something like the following: "Android Debug Bridge version 1.0.32"
Once that is in place, and as long as you followed the steps in the documentation, you should have the following device online when you hit the run button:
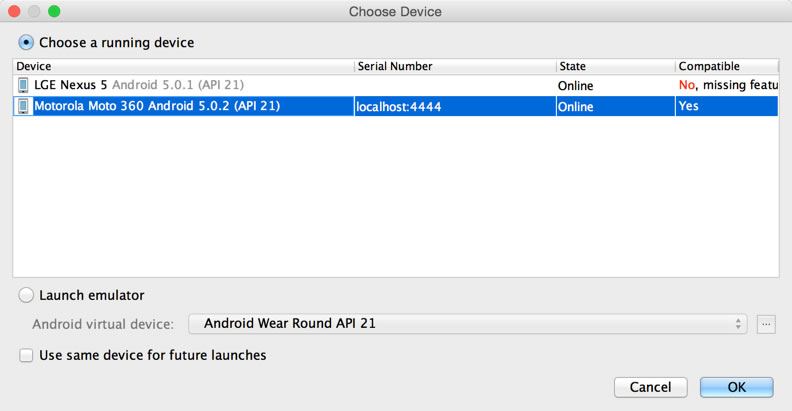
Select your watch and make sure it says, "Yes" in the compatible field. Give it a few minutes to compile and load the APK onto your watch. You should see the "Speak Now" screen and be able to provide a whole number.
Here is a quick video that I made showing it in action:
The source code for this app can be found here. Go ahead and fork the repo and try adding additional features. Some ideas I have are:
- The ability to take two input parameters such as the tip amount and tip percent;
- Instead of the "Speak Now" text when the app is launched, make it say "Enter Tip Amount";
- Make the tip amount appear on the phone as well as the watch after it calculates the total amount.
Wrap-Up
Today we learned how to write an app that runs on your wrist. With the recent improvements in Google Wear with Lollipop, this should help you on your journey to writing more wearable apps.
If you'd like to go further, check out the additional resources below:
- Google's Developer Blog – A blog by Google that covers all of their technology including wearables.
- Google's Wear Site – This is the landing page for Android wearables. It should be your starting point for developing an Android Wear app.
- Android Central's Wearable Blog - A 3rd party blog which includes tips and tricks to make the most of your Android Wear device.
- Telerik UI for Android – Native controls for Android which include a variety of Charts, Calendar, ListView and more.
Header image courtesy of TechStage

Michael Crump
Michael Crump is a Microsoft MVP, Pluralsight and MSDN author as well as an international speaker. He works at Telerik with a focus on everything mobile. You can follow him on Twitter at @mbcrump or keep up with his various blogs by visiting his Telerik Blog or his Personal Blog.
Comments
All articles
Topics
Latest Stories
in Your Inbox
Subscribe to be the first to get our expert-written articles and tutorials for developers!
All fields are required